Level 0
1. 마일스톤 작성
| 0일차 (3월 31일) | 1일차 (4월1일) | 2일차 (4월 2일) | 3일차 (4월 3일) | 4일차 (4월 6일) |
| ch1 ~ ch5 강의 수강 | 강의 TIL 로 정리 | 필수 LV 1 | 필수 LV 2, 도전 10, 11 |
도전 12, 13 |
2. fork - clone

3. yml 파일 생성
jwt secret key 가 없다그래서 yml 파일 생성

spring:
  datasource:
    url: jdbc:mysql://localhost:3306/nbcam
    username: root
    password: 12345678
    driver-class-name: com.mysql.cj.jdbc.Driver
  jpa:
    show-sql: true
    hibernate:
      ddl-auto: create-drop
    properties:
      hibernate:
        format_sql: true
    defer-datasource-initialization: true

## ???? ??? ???
jwt:
  secret:
    key: thisistako220410iamhappytolivewithyou220410mycutesleepycat220410
Level 1
todos 호출 오류 해결
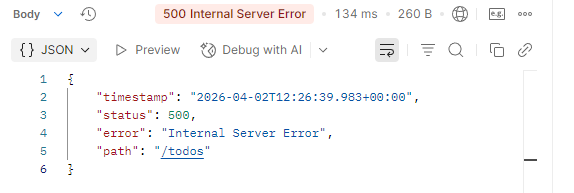
| Caused by: java.sql.SQLException: Connection is read-only. Queries leading to data modification are not allowed |
POST /todos 요청은 게시글을 생성하는 요청이고, DB 에 써야하는데
service 단에서 readOnly = true 로 설정되어있다
@Service
@RequiredArgsConstructor
@Transactional(readOnly = true) # service 단에서 readOnly 를 붙여줘야 안전
public class TodoService {

    private final TodoRepository todoRepository;
    private final WeatherClient weatherClient;

    @Transactional # 여기 수정!
    public TodoSaveResponse saveTodo(AuthUser authUser, TodoSaveRequest todoSaveRequest) {
		# 생략
    }
Level 2
jwt 이해
1. userEntity 에 String nickname 추가
생성자를 사용하고 있는 곳을 수정
2. jwt token 을 생성하고 있는 곳에서 추가 claim 으로 nickname 을 넣어줬다
이제 파싱할때 getClaims 로 nickname 을 사용할 수 있음
public String createToken(Long userId, String email, UserRole userRole, String nickname) {
    Date date = new Date();

    return BEARER_PREFIX +
            Jwts.builder()
                    .setSubject(String.valueOf(userId))
                    .claim("email", email)
                    .claim("userRole", userRole)
                    .claim("nickname", nickname)
                    .setExpiration(new Date(date.getTime() + TOKEN_TIME))
                    .setIssuedAt(date) // 발급일
                    .signWith(key, signatureAlgorithm) // 암호화 알고리즘
                    .compact();
}
Level 3
JPQL 로 구현...
weather 조건으로 검색할 수 있도록 함
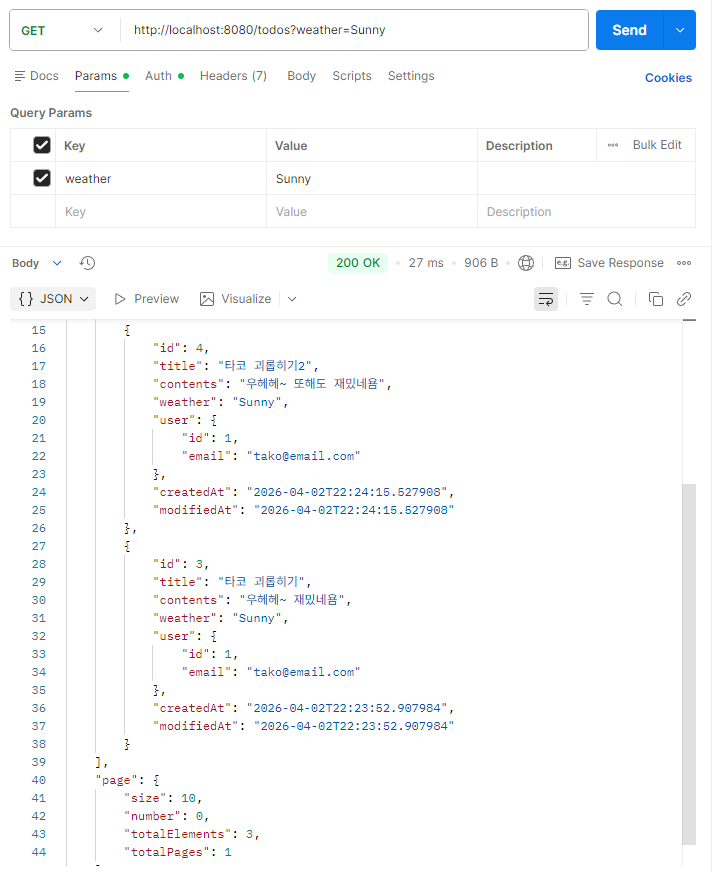
Weather 먼저 해봤다

수정일을 String 으로 받으니까 비교가 안 됨
-> 그냥 LocalDateTime 으로 받아오기
@Query("SELECT t " +
        "FROM Todo t LEFT JOIN FETCH t.user u " +
        "WHERE (:weather IS NULL OR t.weather = :weather) " +
        "AND (:startModified IS NULL OR t.modifiedAt >= :startModified) " +
        "AND (:endModified IS NULL OR t.modifiedAt <= :endModified) " +
        "ORDER BY t.modifiedAt DESC")
Page<Todo> findAllByOrderByModifiedAtDesc(
        @Param("weather") String weather,
        @Param("startModified") LocalDateTime startModified,
        @Param("endModified") LocalDateTime endModified,
        Pageable pageable);
처음에 작성했을 때 ( ) 괄호를 쳐주지 않아서 계속 postman 에서 인식을 제대로 못 했다
AND 보다 OR 이 먼저 계산되므로 아래처럼 코드를 작성한다면 주석처럼 해석됨
A or B and C or D and E or F

# -> A or (B and C) or (D and E) or F
꼭 괄호를 적절히 작성해서 원하는 결과값이 나올 수 있도록 하기
추가로 query 문에서 Order By 쓰면 충돌이 날 수 있다고 했으니까 Order By 부분은 Pageable 안으로 넣어줬다
어차피 사용하는 method 가 findAllByOrderByModifiedAtDesc 였으니까!
Pageable pageable = PageRequest.of(page - 1, size, Sort.by("modifiedAt").descending());
Level 4
mockMvc.perform(get("/todos/{todoId}", todoId))
        .andExpect(status().isOk())
        .andExpect(jsonPath("$.status").value(HttpStatus.OK.name()))
        .andExpect(jsonPath("$.code").value(HttpStatus.OK.value()))
        .andExpect(jsonPath("$.message").value("Todo not found"));
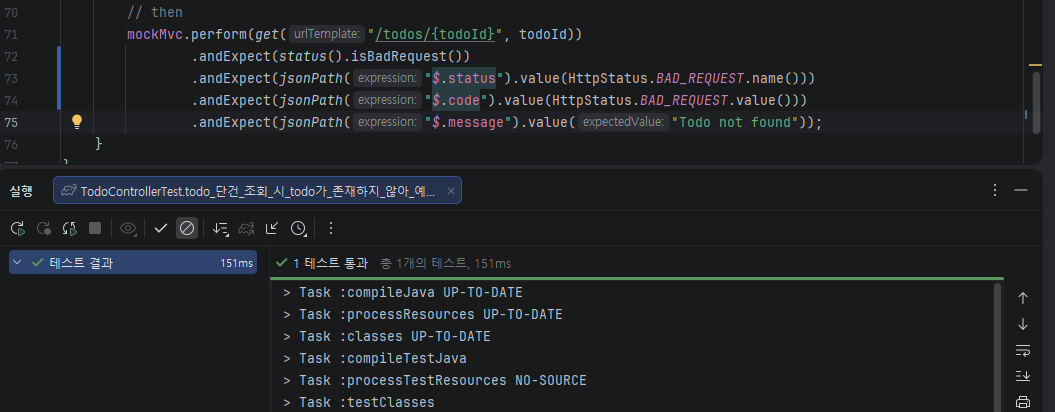
실패 코드인데 status 를 isOk 로 주고있다
코드 실패 화면에서도 확인 가능

mockMvc.perform(get("/todos/{todoId}", todoId))
        .andExpect(status().isBadRequest())
        .andExpect(jsonPath("$.status").value(HttpStatus.BAD_REQUEST.name()))
        .andExpect(jsonPath("$.code").value(HttpStatus.BAD_REQUEST.value()))
        .andExpect(jsonPath("$.message").value("Todo not found"));
NotFound 404 를 내리면 더 좋았겠지만 일단 실제로 나와야하는 값이 400이므로 BAD_REQUEST 내리기
Level 5
수정 전 AOP 코드 : UserController 의 getUser 메서드를 실행한 후 log를 남기는 AOP
수정 후 AOP 목표 :UserAdminController 클래스의 changeUserRole 메서드 실행 전 log를 남기도록 함
@Before("execution(* org.example.expert.domain.user.controller.UserAdminController.changeUserRole(..))")실행 위치와 시점을 수정
접근해서 제대로 log 가 찍히는지 확인해보기
| 2026-04-03T00:06:44.147+09:00 INFO 13868 --- [nio-8080-exec-4] o.e.expert.aop.AdminAccessLoggingAspect : Admin Access Log - User ID: 2, Request Time: 2026-04-03T00:06:44.147186600, Request URL: /admin/users/1, Method: changeUserRole |
원하는 로그가 잘 찍힌다
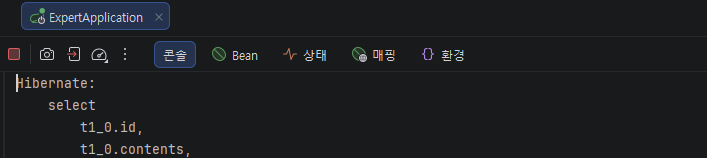
설정해둔 changeUserRole method 가 아니면 log가 찍히지 않는 것도 확인
Level 6
사실 cascade 가 삭제될때만 사용이 되는건줄 알았는데
부모 엔티티의 상태가 어떤 변화든 생긴다면 자식 엔티티도 영향을 받게하는 내용이었다 (ㄷㄷ)
할 일을 새로 저장할 시, 할 일을 생성한 유저는 담당자로 자동 등록되도록 설정
manager 와 todo 의 관계를 보면 todo 쪽이 부모, manager 쪽이 자식
@OneToMany(mappedBy = "todo", cascade = CascadeType.PERSIST)
private List<Manager> managers = new ArrayList<>();
코드를 수정해줬다
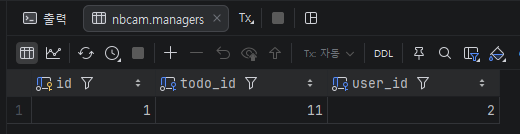
manager 테이블에 아까까지 만들었던 todo 10개는 manager 가 없고, 새로 만든거에만 추가된 것을 확인
Level 7
N+1 문제 해결
Todo 테이블의 Comment 를 조회하려고 하면, 해당 comment 를 작성한 user 의 정보까지 모두 조회하게 되는 문제
(튜터님이 N+1 이라고 읽지말고 1+N 이라고 이해하면 쉽다고 해주셨는데 진짜 머릿속에 잘 들어옴!!! 하하)
해결법... FETCH 를 붙였다
@Query("SELECT c FROM Comment c JOIN FETCH c.user WHERE c.todo.id = :todoId")
List<Comment> findByTodoIdWithUser(@Param("todoId") Long todoId);
ㅋㅋㅋㅋ 이게 맞나....
Level 8
JPQL -> Query DSL 로 수정하기
일단 build.gradle 에 querydsl 을 추가
implementation 'com.querydsl:querydsl-jpa:5.0.0:jakarta'
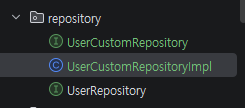
CustomRepository 에 method 를 생성해주고 Impl (구현체) 에 가서 메서드를 구현해준다
public interface UserCustomRepository {
    Todo findByIdWithUser(Long userId); # 메서드 명은 일단 기존 TodoRepository 와 동일
}
Todo entity 에서 userId 만 가질 수 있게 수정해줄까 고민을 좀 했는데 그럼 애초에 findByIdWithUser << 이라는걸 구현을 할 수 가 없는듯하다 (Todo 와 해당 Todo 를 작성한 User를 같이 가져오는게 목표)
# 전

@Query("SELECT t FROM Todo t " +
        "LEFT JOIN t.user " +
        "WHERE t.id = :todoId")
Optional<Todo> findByIdWithUser(@Param("todoId") Long todoId);

# 후

@Override
public Optional<Todo> findByIdWithUser(Long todoId) {

    log.info("Query DSL 실행됨");
    return Optional.ofNullable(
            factory.selectFrom(todo)
            .leftJoin(todo.user, user).fetchJoin()
            .where(todo.id.eq(todoId))
            .fetchOne());
}
그래도 작성해본 manyToOne 삭제 시 동작 형식
userId 만 가지게 된다면 queryDSL 에서 fetch join 을 해줄 필요가 없음 (애초에 jfetch join 이 JPA 연관관계 최적화용)
left join 을 사용해서 찾아주기
return Optional.ofNullable(
    factory.selectFrom(todo)
        .leftJoin(user).on(todo.userId.eq(user.id))
        .where(todo.id.eq(todoId))
        .fetchOne()
);
Level 9
기존 코드 분석
JwtUtil
- id, email, userRole, nickname 을 claim 으로 jwt token 에 넣어주기
- token 파싱, claims 파싱 메서드
AuthUserArgumentResolver
- @Auth 어노테이션과 AuthUser 타입이 함께 사용되지 않았으면 예외를 발생
- attribute 값 가져와서 -> AuthUser 만들기
JwtFilter
- 접근중인 url 이 /auth (로그인, 회원가입) 인 경우 pass
- Jwt token == null -> pass
- 유효성 검사, token 에서 요소를 빼서 httpRequest 로 넣기
FilterConfig
- jwtFilter 를 등록하기
- 모든 요청이 filter 를 타게 되므로 jwtFilter 에서 /auth 인지 확인
사실 맞는지 잘 모르겠다....
일단 바꿔야 하는 부분 정리
1. Filter Config 에 있는 내용을 SecurityConfig 로 옮기고 SecurityFilterChain 에서 해당 역할을 수행하도록 수정
2. token 이 null 이면 일단 filter 를 통과할 수 있도록
3. request 에 setAttribute 로 값을 넣는게 아니라 SecurityContext 에 넣을 수 있도록 하기
4. webConfig, AuthuserArgumentResolver, 삭제
접근 권한 설정
auth 는 permitAll, admin 은 Role 제한
@Configuration
@EnableWebSecurity
@RequiredArgsConstructor
public class SecurityConfig {
    private final JwtFilter jwtFilter;

    @Bean
    public SecurityFilterChain securityFilterChain(HttpSecurity http) throws Exception{

        http
            .csrf(csrf -> csrf.disable())
            .sessionManagement(session ->
                session.sessionCreationPolicy(SessionCreationPolicy.STATELESS))
            .authorizeHttpRequests(authorize -> {
                authorize
                    .requestMatchers("/auth/**").permitAll()
                    .requestMatchers("/admin/**").hasRole("ADMIN")
                    .anyRequest().authenticated();
        })
                .addFilterBefore(jwtFilter, UsernamePasswordAuthenticationFilter.class);
        return http.build();
    }
}
@Slf4j
@RequiredArgsConstructor
@Component
public class JwtFilter extends OncePerRequestFilter {
private final JwtUtil jwtUtil;
@Override
protected void doFilterInternal(
HttpServletRequest request,
HttpServletResponse response,
FilterChain chain
) throws ServletException, IOException {
String bearerJwt = request.getHeader("Authorization");
if (bearerJwt == null || !bearerJwt.startsWith("Bearer ")) {
# 토큰이 없는 경우 그냥 통과
chain.doFilter(request, response);
return;
}
String jwt = jwtUtil.substringToken(bearerJwt);
try {
Authentication authentication = jwtUtil.getAuthentication(jwt);
SecurityContextHolder.getContext().setAuthentication(authentication);
chain.doFilter(request, response);
} catch # 생략
}
}jwt util 에 token 에서 AuthenticationToken 을 만들어서 주는 로직 추가
public UsernamePasswordAuthenticationToken getAuthentication(String jwt) {
    Claims claims = extractClaims(jwt);

    Long userId = claims.get("id", Long.class);
    String email = claims.get("email", String.class);
    UserRole role = UserRole.valueOf(claims.get("userRole", String.class));
    String nickname = claims.get("nickname", String.class);

    AuthUser user = new AuthUser(userId, email, role, nickname);

    return new UsernamePasswordAuthenticationToken(
            user, null, List.of(new SimpleGrantedAuthority("ROLE_"+role))
    );
}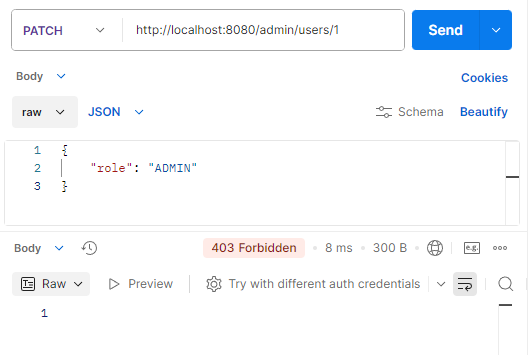
/admin 이 붙었다면 USER 가 접근했을 때 403

ADMIN 으로 로그인 한 후 다시 접근하면 200 OK!
-> Role Based 구현 완료
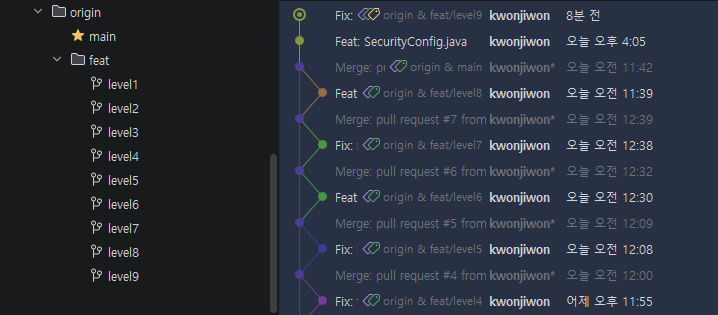
뿌듯한 git flow
'SPARTA 과제 > SPRING' 카테고리의 다른 글
| JOOQ 코드 생성 트러블슈팅 (1) | 2026.04.13 |
|---|---|
| Plus spring 도전과제 (1) | 2026.04.06 |
| 심화) LV 7 Test code (1) | 2026.03.07 |
| 심화) LV 6 코드 리팩토링 (0) | 2026.03.07 |
| 심화) LV 5 API 로깅 (0) | 2026.03.04 |